Only Create Salesforce Leads From Pardot (Existing Customers as New Leads)
- October 24, 2022
- Leads, Salesforce Ben | The Drip


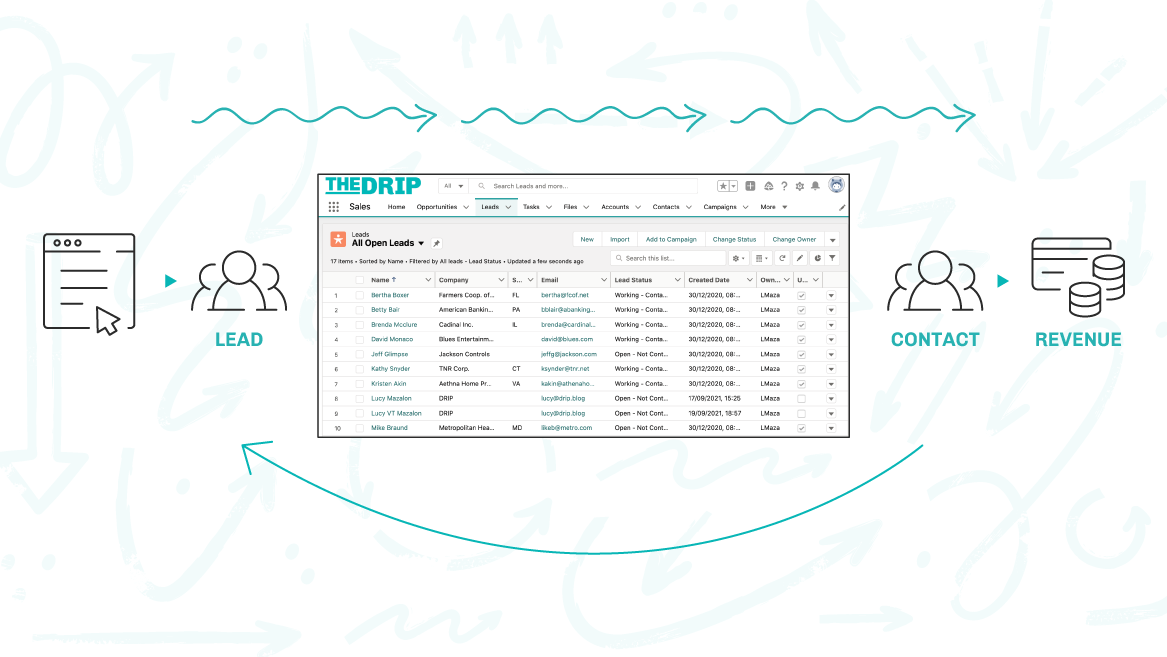
We’ve been thinking about how some organizations don’t fit the mold that’s typical for Pardot (Account Engagement) customers. How you handle existing Contacts when they return, depends on your business operations.
Reasons to send someone back into the lead lifecycle is based around the need to re-qualify – their circumstances may have changed, a previous Opportunity was “Closed Lost”, or the sales team (working Opportunities) want to ensure qualification remains robust. Also, as I will explain, customers don’t always have a clear point of contact at your organization.
Lead life cycles can vary when an existing customer submits a Pardot form. Lucy and I have worked for organizations who wanted to run these unconventional approaches in Pardot and Salesforce.
Here are the two scenarios we wanted to share. When an existing customer submits a Pardot form, either:
- Restart qualification (this guide): Form submissions should become Lead records, and go back through the lead qualification process. This is typical in larger B2B organizations where there are both business development (working Leads) and sales teams (working Opportunities).
- Accelerate to Opportunity: A new opportunity should be launched following a form submission. Pushed into your sales pipeline, repeat customers will receive a faster response from the sales team.


Leads Are Straightforward – What About Contacts?
In an ideal world, Salesforce Contacts and Accounts will have one owner. If a prospect or customer wants to get in touch, they will know who to reach out to. The call or email will get logged as an activity against the Contact record. Simple, right?
Many of us do not live in this ideal world, but one where Contacts and Accounts have multiple owners, covering different regions, and specializing in different products or services. Even if a contact has a single owner, the individual may not necessarily know who that is, or the best way to get in touch.
Leads are straight forward. Someone has a query, they fill out a Pardot form (or form handler), the Salesforce lead assignment rules pass them to the best sales rep.
It’s simple and it works, and in my experience, the more simple a process is, the better!
Our business wasn’t going to change how it operates. We weren’t suddenly going to tell sales that Contacts and Accounts would now have a single owner because:
- Accounts have multiple owners depending on where they are in the world.
- Contacts have multiple owners depending on the different products they have bought over the years.
These are the challenges we faced when rolling out Pardot. We did, however, have a saving grace – our simple Lead process. So, we tweaked this process to get to a resolution.
This guide will show you how to override the default Salesforce-Pardot connector behavior (that syncs prospects to the original Contact record, if it exists). It’s worth investigating if creating new Leads, per enquiry, makes sense for your operations, and isn’t going to skew the metrics that are important to your teams.
Step 1: Create a Salesforce Campaign for Pardot Forms
Create a Campaign in Salesforce, which will have the Pardot forms associated with it.


Step 2: Configure Campaign Member Statuses
The Campaign Member Statuses for the Campaign need to be added/edited. The status is what will fire the Flow to process these members.
Keep the terms generic, and in line with your Campaign Member naming convention. “Responded” is what we decided to go with.


Step 3: Add Completion Actions
Add a completion action to the form/form handlers you’ve singled out:
- Edit the Pardot form, and go to “Step 4: Completion Actions”.
- Scroll down, and add a completion action: “Add to Salesforce Campaign” — [Name of the Campaign] — with status “Responded”.


Step 4: Flow Builder
This Flow is fairly straightforward. To start with, create a record triggered Flow, which will be triggered when a record is created or updated.


For entry requirements, select None. Optimize the Flow for Actions and Related Records.
We will design this process to fire when an existing contact is added as a campaign member, and not a new lead; in other words, if a lead is added to this campaign, the process should not run.
To do this in Flow, add a Decision Element. In this element, we need the following criteria being met. This means that the Contact ID for the Campaign Member record is being set and the Status is Responded.


Finally, you need to tell Flow Builder to create the lead record, and what data that lead should contain. We do this by referencing the existing contact record, and the existing contact fields will be copied on to the new lead’s fields.
A few words of warning: because this is done via the campaign member object, you need to make sure you lookup to the correct values. Lead and Contact fields that have the same purpose have different names; a good example of this is Company vs. Account Name. Then there’s also ensuring that you drill down to the correct objects; taking Company again, the lead record will need to take the value {!$Record.Contact.Account.Name}, which means looking up from the campaign member to the contact, then again to the account (campaign member → Contact → Account). However, for other fields there’s less hassle, for example, with Last Name, you only need to from the campaign member to the contact {!$Record.LastName}.
Something very helpful is to add a short note in the description for your users to say that this is an existing contact that has returned to the start of the lead lifecycle. You can use a formula like the below in the description field (make sure to amend the URL so it works with your org:
“This is an existing contact: https://acook-dev-ed.lightning.force.com/”&{!$Record.Contact.Id}
Your final record create action will look similar to the image below, of course adding your own specific requirements:


Step 5: Test the Flow
Once the Flow is finished and activated, you need to test it to make sure everything is working as it should be.
If done correctly, once an existing contact submits a request through one of your forms, a lead should be created which then gets assigned automatically using your lead assignment rule.
Leverage the “Debug” button and update a record of your choice.


Summary
Organizations rarely operate the same, however, the Salesforce-Pardot is designed with a particular lead management process in mind.
This guide has shown you how you can adapt your Pardot and Salesforce instance to create new Lead, following a form submission – regardless of whether this person exists in your Salesforce database as a Contact. Pushed back into your lead lifecycle, they will go back through the qualification process.
On a side note, this tutorial is a great introduction to Salesforce Flow because you are tasked with creating different elements.
This Pardot article written by:
Salesforce Ben | The Drip
Lucy Mazalon is the Head Editor & Operations Director at Salesforceben.com, Founder of THE DRIP and Salesforce Marketing Champion 2020.
Original Pardot Article: https://www.salesforceben.com/the-drip/create-salesforce-leads-from-pardot/
Find more great Pardot articles at www.salesforceben.com/the-drip/
Pardot Experts Blog
We have categorized all the different Pardot articles by topics.
Pardot Topic Categories
- Account Based Marketing (ABM) (8)
- Business Units (13)
- ChatGPT / AI (3)
- Completion Actions (5)
- Connectors (10)
- Custom Redirects (4)
- Demand Generation (8)
- Dynamic Content (5)
- Einstein Features (11)
- Email Delivery (18)
- Email Open Rates (3)
- Pardot A/B Testing (2)
- Email Mailability (16)
- Do Not Email (1)
- Double Opt-in (2)
- Opt Out / Unsubscribe (14)
- Email Preferences Page (6)
- Engagement Studio (14)
- Industries (1)
- Non Profit (1)
- Landing Pages (10)
- Lead Generation (1)
- Lead Management (12)
- Lead Routing (2)
- Lead Scoring (15)
- Leads (3)
- Marketing Analytics – B2BMA (9)
- Marketing Automation (1)
- Marketing Cloud (2)
- Marketing Cloud Account Engagement (4)
- New Pardot Features (6)
- Opportunities (2)
- Optimization (3)
- Pardot Admin (62)
- Duplicates (1)
- Marketing Ops (1)
- Pardot Alerts (1)
- Pardot API (2)
- Pardot Automations (3)
- Pardot Careers (12)
- Pardot Certifications (4)
- Pardot Consulting (1)
- Pardot Cookies (3)
- Pardot Custom Objects (3)
- Pardot Email Builder (7)
- Pardot Email Templates (9)
- HML (6)
- Pardot Events (16)
- Pardot External Actions (1)
- Pardot External Activities (4)
- Pardot Forms (27)
- Form Handlers (7)
- Pardot Integrations (21)
- Data Cloud (1)
- Slack (1)
- Pardot Lead Grading (5)
- Pardot Lead Source (2)
- Pardot Lightning (1)
- Pardot Migration (1)
- Pardot Nurture / Drip Campaigns (1)
- Pardot Personalization (3)
- Pardot Profiles (1)
- Pardot Releases (19)
- Pardot Sandboxes (2)
- Pardot Segmentation (4)
- Pardot Strategy (7)
- Pardot Sync (2)
- Pardot Sync Errors (1)
- Pardot Tracker Domains (5)
- Pardot Training (3)
- Pardot Vs Other MAPs (4)
- Pardot Website Tracking (2)
- Reporting (22)
- Salesforce and Pardot (29)
- Marketing Data Sharing (2)
- Pardot Users (3)
- Salesforce Automation (4)
- Salesforce Flows (1)
- Salesforce Campaigns (20)
- Salesforce CRM (3)
- Record Types (1)
- Salesforce Engage (3)
- Salesforce Queues (2)
- Security and Privacy (1)
- Tags (3)
- The Authors (483)
- Cheshire Impact (9)
- Greenkey Digital (47)
- Invado Solutions (37)
- Jenna Molby (9)
- Marcloud Consulting (6)
- Nebula Consulting (53)
- Pardot Geeks (38)
- Salesforce Ben | The Drip (235)
- SalesLabX (2)
- Slalom (2)
- Unfettered Marketing (45)
- Uncategorized (1)
- Website Tracking (2)
- Website Search (1)
More Pardot Articles
See all posts
This Pardot article written by:
Salesforce Ben | The Drip
Lucy Mazalon is the Head Editor & Operations Director at Salesforceben.com, Founder of THE DRIP and Salesforce Marketing Champion 2020.
Original Pardot Article: https://www.salesforceben.com/the-drip/create-salesforce-leads-from-pardot/
Find more great Pardot articles at www.salesforceben.com/the-drip/


