Use Salesforce Task Queues with Pardot (for Re-engaged Prospect Alerts)
- July 27, 2021
- Salesforce Ben | The Drip, Salesforce Queues


Why won’t Pardot create a new lead? How can a salesperson, using Salesforce, be notified that one of their existing leads/contacts has engaged with a new campaign? And what if they’re not the assigned owner, but still need to work the lead? Using Salesforce Task Queues with Pardot could be the solution you’re looking for.
I have been a Pardot user for a very long time, and I cannot count how many times I have been asked those questions. If a prospect that has already been assigned engages with a campaign, Pardot won’t create a new lead record in Salesforce. This is frustrating for marketers that have specific use cases, for example, to launch a new product that requires its own qualification process/lead lifecycle.
Deduplication is one of Pardot’s best capabilities, I always say. After all, it’s a good thing that Salesforce doesn’t create a new lead every time an existing customer engages with a campaign – otherwise, can you imagine how many duplicate records your Salesforce org would have?!
When the Task Assignee Isn’t the Lead Owner
My usual suggestion for notifying a salesperson that one of their existing leads/contacts have engaged with a new campaign is to use Pardot’s “Create a Salesforce Task” or “Notify user”, both Pardot completion actions.
However, this works well when you want the person who owns the record to follow up with the lead. Issues can crop up when others are involved in the lead lifecycle, for example, an Inside Sales Team, who are responsible for qualifying the lead first. Every lead record can only have one record owner at a time, and that’s unlikely to be the Inside Sales rep – as a result, it’s not straightforward to assign the Task to them.
Salesforce Task Queues – the solution
Enter Salesforce Task Queues, which can save the day in this scenario. by sending all the “leads” to a central queue.
By creating a Task Queue, and using Pardot to generate Salesforce Tasks, teams can qualify leads before passing them onto the contact owner. The example we’ll use in this tutorial, is a Pardot form submission, a typical prospect activity that demands rapid follow-up.
New to Salesforce Queues? Read: Everything You Need to Know About Salesforce Queues
This guide outlines the steps you need to take to make this happen:
- Create the Task Queue in Salesforce
- Create the Process in Process Builder
- Add a “Create Salesforce Task” Completion Action in Pardot
Note: always build automation like this in a sandbox environment first, and we suggest getting support from your Salesforce Administrator or your trusted Salesforce consulting partner.
Step 1: Create the Task Queue in Salesforce
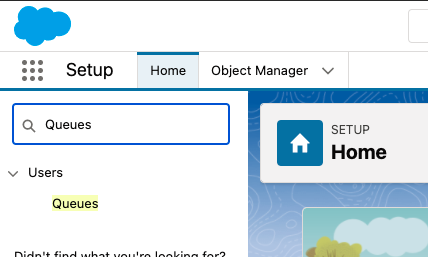
Navigate to Salesforce Setup. Under the Quick Find box, type in “Queues”, and select Queues. Then, click ‘New’.


- Enter the label for the queue. In this example, we have opted to use “SDR Task Queue.” Note that the Queue Name field is automatically populated by Salesforce when you click inside the field.
- For the Supported Objects section, select Task.
- In the last section, select the users, roles, or groups who will be part of this queue. For this example, we have added two users.
- An email address can be added to the Queue Email field, which will trigger an email notification from Salesforce. Alternatively, the Send Email to Members will notify queue members of the user’s email address.
- Once complete, click Save.


Step 2: Create the Process in Process Builder
Navigate to Salesforce Setup. Under the Quick Find box, type in “Process Builder”, and select Process Builder. Click New in the top right corner.


- Enter in a Process Name – in this example, we have opted to use the name “Update Task Owner to Task Queue.” Clicking into the API Name field will also auto-populate the required field. For the final dropdown field “The process Starts when” select A record changes. Once complete, click Save (below, first image)
Process Trigger
- In the Process Builder, click into the + Add Object box to set the Process Trigger – select the Task object. Under “Start the process”, select only when a record is created. Click Save.


Define Criteria for the Action Group
- In the next step, we specify the criteria nodes. Click into + Add Criteria and enter in a name for these criteria on the right-hand side. In this example, we have opted to use “Starts with Form Completed”. For the “Criteria for Executing Actions,” select Conditions are met.


- We then set the condition for the automation to fire – we want to set this for when the task is created with the subject starting with “Form Completed -”
- Click into Field and in the popup, type in “Subject” in the filter box. Select Subject in the dropdown, and click Choose.


- Then, update the Operator to “Starts With”, ensure the Type is set as “String” and finally populate the Value with “Form Completed -”
Your “Set Conditions” table should look like the following:
| Field | Operator | Type | Value |
|---|---|---|---|
| [Task].Subject | Starts With | String | Form Completed – |
- Finally, under the “Conditions” field, select All of the conditions are met (AND). Once complete, click Save.


Set the Actions
The last thing to do is to select the action we want the process builder to take.
- Under the “Immediate Actions”, click into + Add Actions.
- Select the Action Type as Update Records, then enter the name in the field “Action Name” – we have used “Update Task Assigned User” as an example.
- Click into the Record Type field and make the selection “Select the Task record that started your process.”


Moving on to the Criteria section:
- Select No criteria—just update the records! Under Fields, select “Assigned To ID”, update the Type with “Queue”, and enter in the name of the Queue under Value.
The field values update section should look like the following (assuming you have named your queue as “SDR Task Queue” in Step 1):
| Field | Type | Value |
|---|---|---|
| Assigned To ID | Queue | SDR_Task_Queue |
- When all the above has been completed, click Save, then click the Activate button on the top right of the Process Builder screen. Select Confirm in the popup. The Process is now active!


Step 3: Add a “Create Salesforce Task” Completion Action in Pardot
The final step in this automation is to jump into Pardot and update your form.
- From your Form, select Edit Form.
- Click into Completion Actions and add Create Salesforce Task. Note it is important that the subject of the Task starts with “Form Completed -” as this is the criteria that we have set to trigger the change of Task Owner.
- Once done, click Confirm and Save.


Every task created in Sales Cloud that starts with “Form Completed -” will now update the assigned user to the queue, on creation:


Take it further
Based on your specific business requirements, the contributors came up with some ideas to extend this solution:
- Adding the Contact to a Campaign, with a Campaign Member Status,
- Automate the creation of Opportunities with contact roles,
- Automate the allocation of tasks to users according to business processes as opposed to a queue,
- Modify the notification channels to include an email, a custom notification in Salesforce, or to a Slack channel.
Finally, this isn’t the first time we’ve leveraged Salesforce Queues to solve some tricky lead lifecycles! Next, check out: How to Use Salesforce Queues with Pardot to Reassign Qualified Prospects.
The Brains Behind the Solution
We have seen many organizations and marketers struggling with this sort of challenge and hope that this solution will help solve this.
Ling Lee – contributor
Building brands and businesses with CRM and marketing automation – that’s Ling. Ling is a Salesforce 11x Certified Consultant at Destined specializing in cross-cloud solution design.
Other contributors
A special thank you goes to the members of the focus group we have built for this topic and the time they have dedicated to it:
Claudia Hoops – Snr Pardot Implementation Consultant, Destined
Lindsey Mark – Salesforce B2B Marketing Partner Enablement, Pardot
Ben La Mothe – Pardot Solutions Architect, BDO USA
Lara Black – Marketing Operations Manager, League
Jen Kazin – Independent Consultant, Greenkey
Becka Miller – Senior Consultant, Slalom
This Pardot article written by:
Salesforce Ben | The Drip
Lucy Mazalon is the Head Editor & Operations Director at Salesforceben.com, Founder of THE DRIP and Salesforce Marketing Champion 2020.
Original Pardot Article: https://www.salesforceben.com/the-drip/use-salesforce-task-queues-with-pardot-for-re-engaged-prospect-alerts/
Find more great Pardot articles at www.salesforceben.com/the-drip/
Pardot Experts Blog
We have categorized all the different Pardot articles by topics.
Pardot Topic Categories
- Account Based Marketing (ABM) (8)
- Business Units (13)
- ChatGPT / AI (3)
- Completion Actions (5)
- Connectors (10)
- Custom Redirects (4)
- Demand Generation (8)
- Dynamic Content (5)
- Einstein Features (11)
- Email Delivery (18)
- Email Open Rates (3)
- Pardot A/B Testing (2)
- Email Mailability (16)
- Do Not Email (1)
- Double Opt-in (2)
- Opt Out / Unsubscribe (14)
- Email Preferences Page (6)
- Engagement Studio (14)
- Industries (1)
- Non Profit (1)
- Landing Pages (10)
- Lead Generation (1)
- Lead Management (12)
- Lead Routing (2)
- Lead Scoring (15)
- Leads (3)
- Marketing Analytics – B2BMA (9)
- Marketing Automation (1)
- Marketing Cloud (2)
- Marketing Cloud Account Engagement (4)
- New Pardot Features (6)
- Opportunities (2)
- Optimization (3)
- Pardot Admin (62)
- Duplicates (1)
- Marketing Ops (1)
- Pardot Alerts (1)
- Pardot API (2)
- Pardot Automations (3)
- Pardot Careers (12)
- Pardot Certifications (4)
- Pardot Consulting (1)
- Pardot Cookies (3)
- Pardot Custom Objects (3)
- Pardot Email Builder (7)
- Pardot Email Templates (9)
- HML (6)
- Pardot Events (16)
- Pardot External Actions (1)
- Pardot External Activities (4)
- Pardot Forms (27)
- Form Handlers (7)
- Pardot Integrations (21)
- Data Cloud (1)
- Slack (1)
- Pardot Lead Grading (5)
- Pardot Lead Source (2)
- Pardot Lightning (1)
- Pardot Migration (1)
- Pardot Nurture / Drip Campaigns (1)
- Pardot Personalization (3)
- Pardot Profiles (1)
- Pardot Releases (19)
- Pardot Sandboxes (2)
- Pardot Segmentation (4)
- Pardot Strategy (7)
- Pardot Sync (2)
- Pardot Sync Errors (1)
- Pardot Tracker Domains (5)
- Pardot Training (3)
- Pardot Vs Other MAPs (4)
- Pardot Website Tracking (2)
- Reporting (22)
- Salesforce and Pardot (29)
- Marketing Data Sharing (2)
- Pardot Users (3)
- Salesforce Automation (4)
- Salesforce Flows (1)
- Salesforce Campaigns (20)
- Salesforce CRM (3)
- Record Types (1)
- Salesforce Engage (3)
- Salesforce Queues (2)
- Security and Privacy (1)
- Tags (3)
- The Authors (483)
- Cheshire Impact (9)
- Greenkey Digital (47)
- Invado Solutions (37)
- Jenna Molby (9)
- Marcloud Consulting (6)
- Nebula Consulting (53)
- Pardot Geeks (38)
- Salesforce Ben | The Drip (235)
- SalesLabX (2)
- Slalom (2)
- Unfettered Marketing (45)
- Uncategorized (1)
- Website Tracking (2)
- Website Search (1)
More Pardot Articles
See all posts
This Pardot article written by:
Salesforce Ben | The Drip
Lucy Mazalon is the Head Editor & Operations Director at Salesforceben.com, Founder of THE DRIP and Salesforce Marketing Champion 2020.
Original Pardot Article: https://www.salesforceben.com/the-drip/use-salesforce-task-queues-with-pardot-for-re-engaged-prospect-alerts/
Find more great Pardot articles at www.salesforceben.com/the-drip/


